How to build your own pull up / jump station
So you say you want to build your own outdoor pull up station? Well I can walk you through what I did to make my own recently which will be used for a 300 challenge we are running with my buddies. I also made a 24 inch high jumping platform.
Ok first off, what will you need? The one thing a pull up bar needs to be more than anything else is sturdy so I chose 4 x 6 lumber as the supports. Here is a list of everything that was used.
Qty 2 – 12 foot long 4×6 pressure treated posts
1 – 1 inch diameter, 8 foot galvanized pipe (to resist rusting)
1 – 1.5″ wood boring bit
2 – 7 inch long 3/8″ bolts, with 2 nuts and 4 washers
1 – 3/8″ metal drilling bit
3 – 50 pound bags of quick set concrete
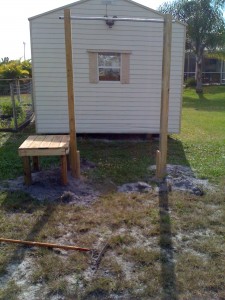
Ok I was debating how deep to sink the posts and if I was going to use the entire 12 feet section. After doing some reading and knowing that I wanted the final height of my bar to be somewhere around 8 feet high, I decided to cut a foot off each post to bring their length down to 11 feet. I then planned to dig an approximately 3 foot deep hole with the post hole digger.
I dug a hole bigger than what you would use for a normal post because you want extra space to fill in with concrete for strength. I would guess the hole was about 10-12 inches in diameter at the top. You don’t need to keep it that wide all the way to the bottom.
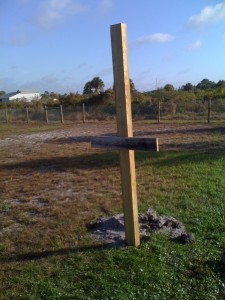
I temporarily attached a piece of 1×6 wood to the posts to assist with manipulating the post. The posts were heavy and slimy from the pressure treatment solution so the temporary handle was very handy.
After digging my hole I inserted and removed the post several times until I had the portion out of the ground right at the 8 foot mark. One thing you may want to do that I did not is put some crushed stone in the bottom of your hole for drainage. Since our soil here is basically sand I wasn’t very concerned about drainage.
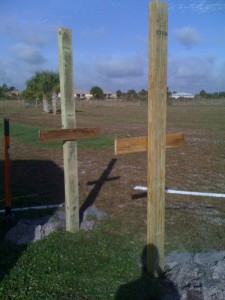
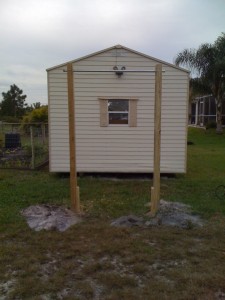
After getting my first post in the hole I measured over 4 feet and dug my second hole and placed the post, again making sure it was as close to the same height as the first pole as possible. I then kicked a small amount of fill back into the hole so I could use it to keep the posts in place as I made them level.
Now not only do the posts need to be level, they also need to be parallel to each other so the pipe threads through them cleanly. To make them parallel I used another long piece of 1 x 6 and laid it across the front of the posts and made sure the posts were flush against the board. Again my temporary T-brace came in handy for making those adjustments.
Ok so after making sure the posts were level and flush I was almost ready to add concrete. I dumped a bit more dirt in the holes and used my tamping bar to compact it tight around the post to hold it in place. After verifying the posts had not moved I was ready to add concrete.
I pulled over the hose and filled the hole 1/3 of the way with water. You then add concrete until it reaches above the water. You then add another 1/3 of water, add concrete, add water, until you fill the hole.
I decided to let the concrete set for a few hours before I would begin work on installing the pipe to make sure the posts weren’t going anywhere.
The first thing I had to do was cut the pipe to length using my sawzall with a metal cutting blade. I cut the pipe so that I would have a few inches extending beyond either side of the posts.
The pipe was labeled as 1″ (made in China by the way) so I figured I would need a 1″ wood boring bit. Well I quickly discovered that the 1″ refers to the inside diameter of the pipe, the outside of the pipe is 1.25″ in diameter. To be safe I wound up using a 1.5″ inch wood boring bit. I went down about 4 inches from the top of the post and centered the bit to drill the hole.
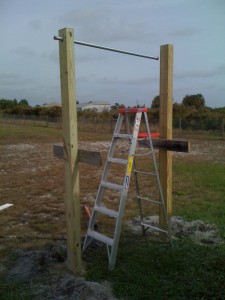
The pipe slid nicely through the hole so now I just needed to drill the hole in the second post. It is important that the bar is level obviously. To facilitate this I held a level on top of the pipe as I centered it on the other post, using a pencil to draw an outline of where my second hole would be.
After drilling the hole I nervously slid the pipe towards it, hoping everything would line up properly, it did. The last thing I needed to do now was use the bolts to secure the pipe in place. This turned out to be one of the trickier parts of the install.
I got my eyes down to pipe level so I could determine where to drill a hole that would more or less split the pipe in half. I used a 3/8″ wood bit until I hit metal. Once I did, I switched to the 3/8″ metal bit. Drilling through the pipe was a challenge. It wanted to spin as I drilled into it. I had to use a death grip with my one hand while drilling the hole with the second hand.
Once I punched through the pipe I loaded the wood bit back in and drilled through the other side, taking measurements from the first hole to try to line me up for the second. I got close enough that I
saw daylight and was able to push the 7″ bolt through. I used two washers for each bolt, one at the nut and bolt head side to be safe.
After bolting the one side, the second one went smoother since I knew what to expect. After a few cranks with a wrench the pipe was secured and the pull up station was complete! Just for the hell of it I attached two scrap pieces of 2×6 to the inside of each post as an assist for potential pull up participants that could be vertically challenged.
I grabbed a hold of the bar and did a few reps to test it out. The structure felt extremely solid which is what I was hoping for.
The next day I built my 2 feet high jump station. I won’t go into much detail here as it is a pretty straight forward process.
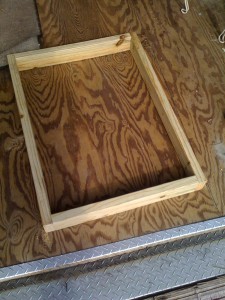
I used pressure treated 2×4’s for the top frame. I used a countersink tool to predrill the holes for the screws to minimize splitting near the ends of the wood later on.
I used two 36″ and two 24″ pieces for the frame to give us plenty of landing area. I used 4×4’s for the legs cut to 23 inches to allow an inch for the decking that goes on top.
